3D model description
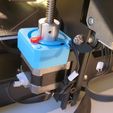
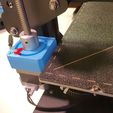
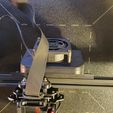
Save your Z-level, by marking the position of the lead screws using these pointers that fit perfectly around the z-motor couplers.
Carry out the z-leveling using "Machine Leveling" → "Z Tilt" on the Klipper screen. Home your print head. Then mark where the lines on the lead screw couplers fall. You will immediately notice if your Z motors get out of sync, and you will know how to adjust the screws without redoing the leveling!
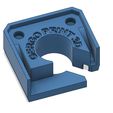
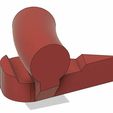
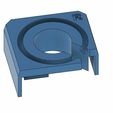
Included Left and Right z-motor caps, and five variants of the pointers for an accurate fit regardless of the clearance of your printer.
Watch demo and z-alignment tutorial (for the SV06/SV06+) on YouTube: https://youtu.be/VI7icch4VEM
The SV07 / SV07 Plus do not need manual z alignment, as the printer can carry out the inductive probe method automatically using the menu command "Machine Leveling" → "Z Tilt"
INSTALLATION:
- Print the two motor caps (detailed instructions below)
- print two pointers preferably from a different color
- Insert the pointers into the motor caps
Important step:
4. raise the print head 200mm over the print bed (otherwise the X axis carriage will be in the way, and you will not be able to install the motor caps)
5. shut down the printer
Right side:
6. slide the right motor cap diagonally over the lead screw then lower to the top of the motor
Left side:
7. temporarily disconnect the filament runout sensor
8. partially remove the cable from the cable channel
9. so you can install the left motor cap similarly to the right side
10. push the filament runout sensor cable back into the channel and reconnect it
After installation, commands on the printer:
- Temperature → Bed → 70°C
- Machine Leveling → Z-Tilt
- Home → Home All
After this mark the positions of the lead screw lines on both z-markers
If you notice the z motors are out of sync (always check AFTER homing the print head):
1. Actions → Disable motors
2. Adjust the lead screws manually
3. Home → Home All
3D printing settings
All pieces can be printed out of PLA, without brims and supports! The STLs are oriented the way you should print them.
Z-motor caps: 0.2mm layer height, regular speed, 2 walls, minimal infills (e.g. "Lightning 20%"). If the groove (which is printed up-side-down) doesn't turn out smooth enough slow down between layers 20-25. Print time 15-20 minutes each.
Pointers: print one for each cap, using a contrasting color, 0.1mm layer height, slow speed. It is small, there is no infill with 2 walls. Print time: 2 minutes each. Start with "pointer 3.stl", if it turns out to be too tight, try "pointer 2 or pointer 1", if too loose try "pointer 4 or pointer 5".
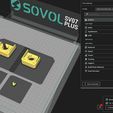
I included a screenshot of the model positions in the slicer, please note these pieces should be printed "one at a time"!

/https://files.cults3d.com/uploaders/22944044/illustration-file/ac2dc85e-9d6b-44f1-9fad-8303e24ec742/20231020_172505.jpg)
