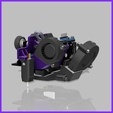
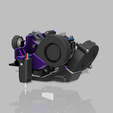
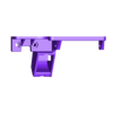
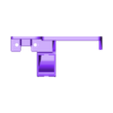
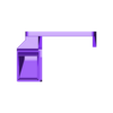
Support plate for moving the CR-Touch probe and replacing the original hot end fan with a 4020 or 5015 fan.
This reduces fan speed to around ~60% and lowers fan noise.
The CR Touch probe is aligned with the nozzle on the Y axis, providing a more precise mesh.
*This design only includes the parts shown in purple in the first two images.
It is compatible with longer hot ends such as Creality's high flow kit (Spider), "Volcano" Ceramique...
The added weight compared with the original parts (3010 radial fan and fairings) is +7 grams with the 4020 fan and +10 grams with the 5015 fan.
You can find my other material ventilation designs here:
V3
V4
ModulR
This design is intended for the S1 and S1 Pro, if you have another printer with the Sprite extruder you may need to make modifications.
Some have adapted it for the Ender 3 V2 but the CR-Touch support part touches the pulley cover before making contact with the limit switch.
For example, you'd need to add a screw to the top of the CR-Touch through the plate to make contact with the switch.
CR Touch offsets :
x_offset: -48
y_offset: 0
Offsets for cylindrical probe ABL, EZABL...
8 mm diameter :
x_offset: -48
y_offset: -6
18 mm diameter :
x_offset: -49.5
y_offset: -13.1
Assembly and hardware:
With 4020 fan :
2x M3 16 mm screws
1x screw M3 5 mm
2x M3 nuts (probe)
With 5015 fan:
2x M3 screws 18 mm
2x M3 5 mm screws
2x M3 nuts (probe)
With KLIPPER
You can modify the offset in the "printer.cfg" file.
Here are my settings, which you may need to adapt on your printer. If necessary, you can find all the information directly on the Klipper website link
[bltouch]
x_offset: -48
y_offset: 0
You may also need to adjust your mesh and end positions.
Here are the values I use that work for me:
[stepper_x]
position_endstop: -4
position_min: -4
position_max: 254
If, during meshing, your extruder carriage hits the metal part at the stop of the X axis, you must reduce your "position_max" of the X axis.
[stepper_y]
position_endstop: -2
position_min: -2
position_max: 235
[bed_mesh]
mesh_min: 30, 30
mesh_max: 205, 205
If you get an error when meshing, it's probably because you need to reduce the mesh because it's larger than your "position_max". Try for example:
*bed_mesh]
mesh_min: 35, 35
mesh_max: 200, 200*
To center your Z home in the middle of the board:
[safe_z_home]
home_xy_position: 165, 116
To set the fan speed to 60%, for example:
[heater_fan hotend_fan]
fan_speed : 0.6
Then perform a PID calibration with your new fan speed.
With Marlin
/!\ I don't know if it's possible to vary the hotend fan speed from the original firmware. The power of the 4020 or 5015 fan at 100% speed will certainly be too high.
It is possible to reduce the fan speed with a voltage step-down device.
You can use gcode commands to modify the position of the CR-Touch probe.
Download and install Pronterface and connect your printer via USB.
Then, in the terminal on the right, you should be able to use the M851 gcode, e.g. M851 X-48 Y0
Then use M500 to save them, and M501 to set them as the active configuration.
You can check this using the M503 command.

/https://files.cults3d.com/uploaders/23882450/illustration-file/f11e176e-20eb-48f7-be5a-ea96cc94f330/1-Hotend-4020.png)
