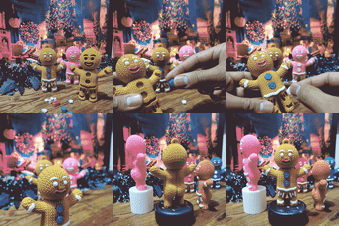
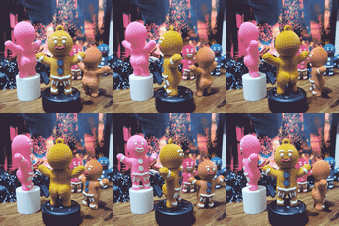
Cool knitted gingerbread man 🎄🎅🌟
It's Christmas 2023, and we're showing off the fresh gingerbread cookie design. It's got a cool knitted texture look and a new twist on this classic Christmas model. You can print it just fine using PLA, or any FDM-style 3D printer filament, or even with resin printers.
The result of 3d printing and design + Christmas = Some cool stuff for 3d print #CHRISTMASXCULTS
This model is in the Cults 2023 Christmas design contest. We'd really appreciate it if you could hit that like button on the website, drop a comment, or share your 3D print results with others. 🌟🌟🌟🌟🌟
Please read full documents with printing instructions HERE: https://drive.google.com/file/d/1gU8e25_jyv7qg4QZ96ktJzBtwrWS3VS5/view
Features of this new model:
Designed to assemble easily
Print it in parts – start with the body and then add the accessories. Mix and match colors for a cool look or print it all in one go, no assembly required. You can even paint it however you like.
Multiple versions to choose from
There's a version for multi-color 3D printers like the Bambulab model. Hang it on your Christmas tree if you want.
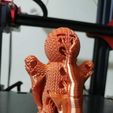
Printing tip: For the body, you'll need tree-like supports because of some overhangs. Don't forget to support the mouth, the stomach hole, the feet's end holes, and a bit for the arms.
Brand new design
We've given the classic gingerbread cookie a fresh, fun look for this Christmas. It's got a cool knitted finish.
Printing instructions for the assembly and part-by-part version:
1.Ensure your 3D printer is level and calibrated and select the material and colors you'll use.
2.Download the 3D model and unzip the files.
3.Choose the version you want to print:
a) Model for assembly and part-by-part printing
b) Model for assembly and part-by-part printing with a hook
4.Use your favorite slicing software to prepare the model. Pay close attention to areas that need supports.
The full-body STL file is the only one requiring supports. Recommended support areas are the mouth, the middle stomach hole, the two end-of-feet holes, and some support for the arms.
We recommend watching some Youtube tutorials to properly add tree-like supports when slicing:
All assembly accessories for the model (18 parts), like buttons, mouth, leg ornaments, etc., are printed separately and don't need supports. You can mix colors for a cooler look.
Printing parameters:
a) For the body of the design:
- 2-3 perimeters
- Layer height: 0.20 mm
- Infill: 15-20%
- Tree-like supports with an overhang angle of 70-80%
- To improve first-layer adhesion, it's recommended to use the Brim option in Cura.
b) To print the parts that assemble onto the body of the model:
- 2-3 perimeters
- Layer height: 0.20 mm
- Infill: 15-20%
- Do not use supports
- To improve first-layer adhesion, it's suggested to use the Brim option in Cura
- Print the left and right side pieces separately.
5.After printing all the pieces, remove any excess material or burrs from them to ensure proper assembly.
6.Assemble the pieces using adhesive to hold them together.
7.Enjoy!
Printing instructions for the assembled model (file that doesn't require joining or assembling parts):
1.Ensure your 3D printer is perfectly leveled and calibrated and select the type of material and colors you intend to use.
2.Download the 3D model and unzip the files as needed.
3.Choose the version you want to print:
a) Model for assembly and part-by-part printing
b) Model for assembly and part-by-part printing with a hook
4.Slice the model using your preferred slicer software, paying close attention to areas that require supports.
It's recommended to watch some Youtube tutorials to properly add tree-like supports when slicing:
Printing parameters:
- 2-3 perimeters
- Layer height: 0.20 mm
- Infill: 15-20%
- Tree-like supports with an overhang angle of 70-80%
- To improve first-layer adhesion, it's recommended to use the Brim option in Cura.
5.Print and enjoy.
...
Also, you can try my last knotted model here:
https://cults3d.com/en/3d-model/home/knitted-grinch
Do not forget to share your print results and SUBSCRIBE to my Cults account to get updates.
NOTE IMPORTANT: This stl file is just for personal use. Not for commercial use. No derivatives.
:)

/https://files.cults3d.com/uploaders/15816881/illustration-file/84b6eef8-1db1-475d-9b02-2598fd7765f3/Sin-título-1.gif)


